The Great Outdoors on Your Door

I have a confession: I am seldom satisfied with having a regular wreath on my door. My wreaths not only have to be seasonal, but also unusual. As a matter of fact, my Christmas wreath is not even a wreath. It’s an ice skate that I covered in glitter and decorated with winter greenery. And who can forget my Halloween wreath?? Let’s face it: I am not conventional…..mostly.

Anyway, a few weeks ago, I happened to catch an episode of the new Trading Spaces TV show. The theme was bringing the outdoors indoors, and being the kind of gal that likes to reuse and recycle in decor, this was right up my alley. Sticks and stones can break my bones, but not the bank!! One of the featured DIY decor items was a gorgeous wreath made from antler sheds. Deer tend to shed their antlers after rutting, usually in the winter months. A nice walk in the woods can usually net you four or five antler sheds. I have used antlers in decor before, but I thought on a wreath it would be perfect for fall.

You’ll need:

  • Grapevine wreath (one sturdy enough to hold the weight of the antlers)
  • Several antler sheds
  • Moss and lichen
  • Glue gun and glue sticks
  • Wire
  • Wire cutters
  • Needlenose pliers

Continue reading

Repurposed Tableau

A few months ago, I fell into a mine of sewing treadles. A friend who owns a vintage store found a plethora of the things and was willing to let them go at a very, very reasonable price, mostly because she had no room for them and she had no idea what to do with them. Lucky me!!! I was elated until I saw them all in the backyard standing around like leftover skeletons from a cyborg war.

To be honest, they looked rather awesome like that.

But I didn’t want a post-apocalyptic warscape in my backyard. So I lined them up and began to plan what to do with each one. In the end, all but one were going to be table bases (the last was going in the garden to hold an old basin with flowers). And so, I started with paint stripper to remove the old paint, then rust remover and a wire brush. Once my whining and crying and drying was done, I primed them with rust proofing primer. My favorite to use is automotive primer, because it’s designed for metal and the spray paint adheres better. Sometimes it is all I use, because it’s a matte black and looks great on metal items. But I want the treadles to stand out, so I used different colors depending on the setting. The one I use for my vanity is a rose copper color. It’s so feminine!!! The one in the guest bedroom is a pearly color.

This is the one in the living room. I used Rust-Oleum Heirloom White, my go-to, when-in-doubt color. The tabletop I got for free in a garbage pile. I stripped the old stain off and applied a couple of coats of Minwax Polycrylic to seal it. The lamp is an antique I found for a dollar at the thrift store. I didn’t care for the brass stem, so I spray painted it in a rose copper. The architectural findings I literally found in a pile of rubble at an old house that was being torn down. That gorgeous teal green vase I got at Ikea after I saw it on an episode of Property Brothers.

I can’t rely on thrift stores for everything.

Anyway, I hope this has inspired you to rethink old things and make them new again. My vintage store friend liked them so much that she commissioned me to do two more. But those are for her. Not for me. For her.

I have to keep telling myself that 😉

Thanks for stopping by!!

A Chair Named Gilda

A few days ago, I had the pleasure of giving an old vanity bench a makeover.

Ok, I started this bench months ago, but wasn’t motivated to finish it because I couldn’t decide on upholstery for the cushion. Enter my friend who loved the size of the bench and asked for something “girlie” for her daughter. She opted for a fuzzy fabric resembling a poodle’s fur. It was a nightmare to deal with because it is not very opaque, so I had to cover the bright green foam cushion before I could upholster it, and also because cutting it meant a ton of fluff flying around the house competing with the vast amount of dog hair.

I have yet to figure out how it got in my socks.

Anyway, I was left with a scrap of poodle hide and was sorely tempted to toss it. Actually went so far as to put it in a bag and tied it up and put it out in the trash bin. But my conscience was nagging at me. I hate, hate tossing anything out that can be of use later, even as a cleaning rag. So… I dug it back out and put it in the scrap basket thinking to use it later in a pillow, or as a hairshirt. And as I was walking outside to organize all of my spray paint, I saw the cane back chair and an idea was born. Meet Gilda!!

Continue reading

Different Redo

I am in a frenzy to redo and flip a lot of my garage stuff because a friend would like to see about taking it on consignment. Her stuff is more vintage and shabby chic than mine, but she is willing to entertain the idea of my eclectic style. Here’s hoping!

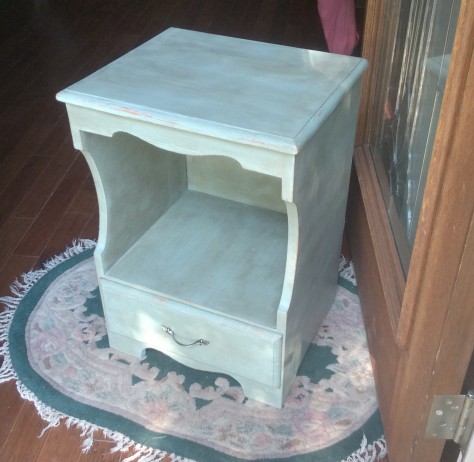
Two weeks ago, I found an old night table at the thrift store. It was only $10, but it was solid wood. I looked it over and figured the dents and scratches would stand out if I went in a shabby direction, so I snagged it.

WIN_20160403_105512

See the dings and dents? I didn’t worry too much over them, since I was going to distress the piece after I painted it. I did three coats of Annie Sloan’s Duck Egg and then distressed it with sandpaper. I sealed it in dark wax, and then went back and removed the extra dark wax with clear wax.

WIN_20160405_171908

You can enlarge the photo so you can see the distressing. I also painted the inside of the drawer in Old White. It came out so pretty. I love the color for bed and bath, and I think this is a nice piece for either room. I can even see it in a living area, with a comfy reading chair and a bunch of books inside.

Thanks for stopping by 🙂

Renewed Relic

My grandmother had a beautiful vanity made from mahogany. It had a very large round mirror and a set of drawers on either side of the small vanity chair. I loved it, and have wanted one similar for a very long time. Unfortunately the ones I have come across tend to be very pricey or have been painted. Fortunately, a few weeks ago I came across a piece that was similar in shape to my grandmother’s vanity. It was just one set of the drawers and very cheap, but it had enough space to store my unmentionables while being small enough in profile to fit in my closet.

WIN_20160404_100749

You can see the sad state it was in. I must have found at least 50 spider sacs and insect carcasses in the drawers and inside the cabinet, not to mention years of grime and dirt. The veneer was very rough and the knobs didn’t match, though one of the knobs was made of bakelite and I shall be using it in another project. Continue reading

Trash is My Kryptonite

And I mean that in the coolest way possible.

A few weeks ago, I was driving through the neighborhood next to mine when my eye was caught by a stubby leg sticking out of a trash heap. It was a plant stand. I snagged it, thinking to use the spindles for some other project. Upon inspection, it only needed a few new screws and some wood filler to make it sturdy again.

WIN_20160217_143007

I love the spindles. They give it such character. I was tempted to use a simple whitewash and distress it, but decided to use chalk paint in a light turquoise color, because I want it to stand out. I have to admit, most of the pieces I flip I redo as statement pieces (the red and gold accent table comes to mind), because they are small. If this had been a shelf unit of a dresser, I would have whitewashed and distressed to make it blend into the background.

Continue reading

Rusty to Refined

A few weeks ago I was picking up some chalk paint at a lovely antique place, when my wandering magpie eyes were caught by a lovely iron gate fragment.

WIN_20160211_082558

It had a lovely patina, but it was very rusty and the green paint all flaky and chippy. It was a lovely piece to hang on a wall, but mindful of lead paint, I had to try and sand it as much as I could before cleaning and sealing it.

This is where the comedy of errors began.

Continue reading

Total Telephone Table Transformation

Try saying that really fast!

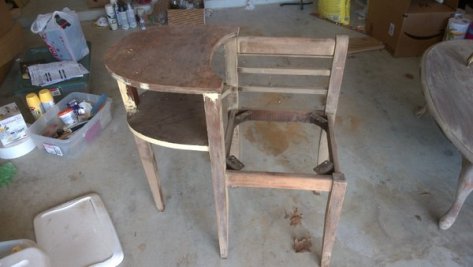
Not long ago, I got a call from the local thrift store (AKA my “dealer”) about a vintage telephone table he received. I hightailed it over there and turned out he had two of them. As much as I want all the thrift things, I picked the more stable of the two to redo. I had seen several telephone tables flipped on my fave TV show, so I was a bit familiar with the process.

telephone table before

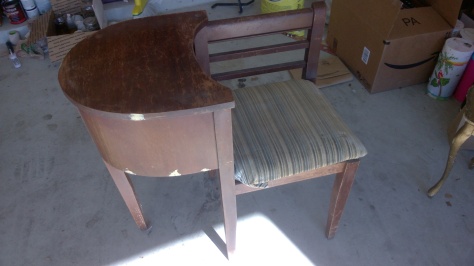
Forgive the mess, but it’s my garage and the only place for me to work. The table had a piece of wood veneer that curved around both table tops to conceal any telephone books placed on the lower section.

WIN_20160109_151233

But I hated it and took it off. I used some wood filler, then sanded, and sanded, and sanded some more, cleaned it up, and primed it.

Continue reading

My $60 Fireplace Wall Makeover

Y’all know by now I am a fan of upcycling and thrift stores and basically picking up trash and trying to make it into treasure. It keeps me happy and doesn’t cost a lot of money, so everyone wins all around.

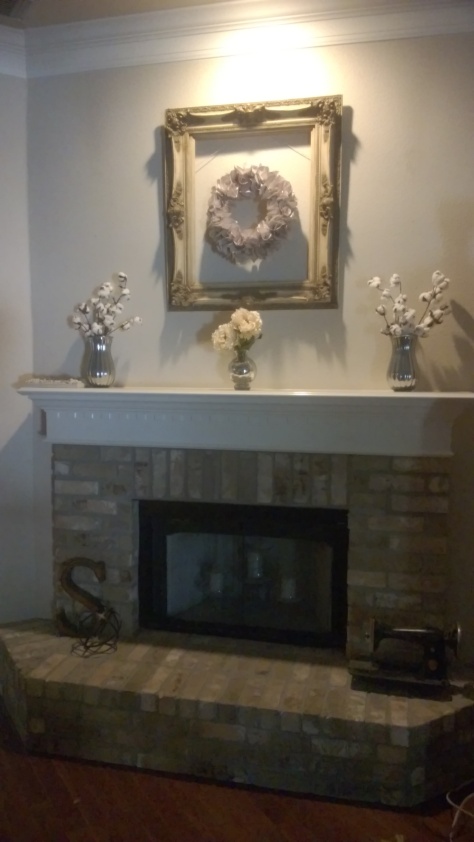
I have been struggling with my fireplace for about….oh…. seven years? The brick is a rather blah tan color, and the mantel is a bleh builder’s grade cream gloss. I have been trying to convince Hubby to let me paint the brick and mantel, and may just be able to do it before the holidays. Maybe. Jury is still out. But until then, I think I’m satisfied enough with it.

WIN_20150927_103217 Continue reading

From Vase to “Vahse”

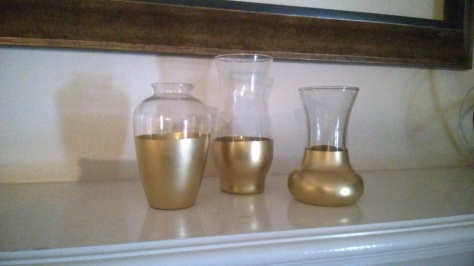
I have never understood the different pronunciations for the word “vase”. My dad told me once that it depended on the vase’s value. That may be fake, but it’s accurate! Anyway, I remember seeing this simple tutorial from Two Twenty One for a painted vase, and dug around my stash of thrift store glassware for some small vases I remembered snagging for a nickle a piece. I found my gold spray paint, newspaper, and paint tape and got to work.

First, you need to clean your vase thoroughly, and then wipe down with alcohol (isopropyl, not bourbon). Next, take a strip of painter’s tape and adhere around the vase, making sure to keep it even and seal the edge that will be against the paint. Now take another strip of tape, and tape the newspaper around the vase right on the first strip, careful not to cover the bottom edge of the first strip. Tuck the paper into the vase to make sure you don’t spray paint in it. Careful do a second wiping of the exposed glass, let it dry, and then spray in short even bursts. One coat is usually enough, but two will even out the coverage. After drying, remove the tape strips and VOILÁ!!!

WIN_20150825_172209

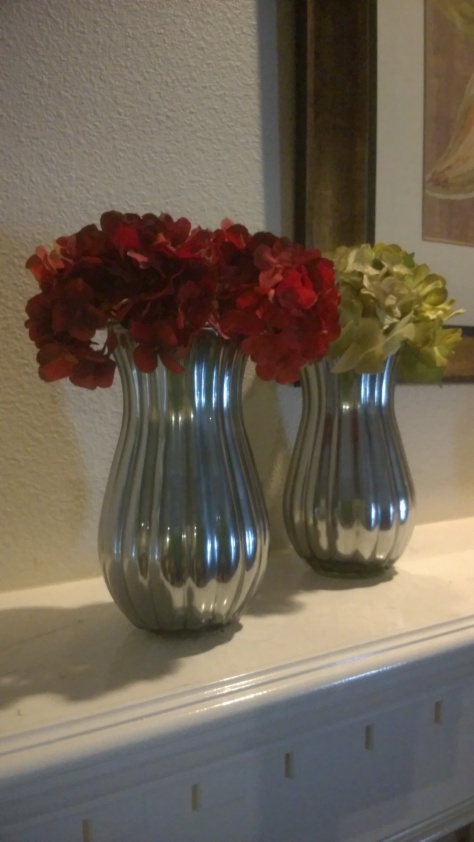
How cute are they?? I just love how they turned out, and like grouping them together. I have no idea what I’m going to do with them, but I can see placing a pretty bloom in each one and clustering them on a dresser or a vanity. I also took the opportunity to paint two “Pro-Flowers” vases I had collecting dust in the garage. I plan on using them to flank a future project for the fireplace area.

WIN_20150825_172422

All I did was clean out the inside of each vase and wipe down with alcohol, then sprayed Looking Glass spray paint from Krylon™ on the inside. Unlike the gold paint, the looking glass paint needs several coats to cover well, and you have to do short, light bursts. Otherwise the paint will streak and run. These took five coats each to finish. If my tutorial is a little confusing, hit the link above and Chelsea will walk you through it. Check out her blog for other DIYs, too.

Thanks for stopping by!! 🙂